

Table of Contents
- What You'll Need for Accurate Measurements
- How to Measure for Muscle Fit: Step-by-Step
- How to Measure Chest for T-Shirts
- Muscle Fit vs Slim Fit: What's the Difference?
- Tailoring Tips for Athletic Builds
- Common Mistakes When Measuring Body Parts
- Conclusion
- Frequently Asked Questions
Last Updated: September 24, 2026
What You'll Need for Accurate Measurements
Getting a true muscle fit starts with the right tools, not guesswork. A flexible tape measure and a mirror are the two essentials.
Here's what to gather before you start:
- A soft, flexible tape measure (not a rigid builder's tape)
- A full-length mirror, or a willing friend
- A notebook or phone for recording numbers
- Light clothing, or no shirt at all
- A pen to mark your landmarks
Fitizen has helped athletes, lifters and bodybuilders worldwide find clothing that fits their build, and the same principle applies here: accurate numbers beat vague guesses every time.

Stand tall and breathe normally. Measuring after a workout inflates your numbers due to blood flow, so wait a few hours.
How to Measure for Muscle Fit: Step-by-Step
Learning how to measure for muscle fit means capturing four key areas: chest, arms, thighs and calves. Each one takes under a minute once you know where the landmarks sit. The NHS guide to measuring your body confirms that consistent technique matters more than the specific tape you use, so the goal is repeatability, not perfection on day one.
Before you start, decide which of the two jobs you are doing, because the tape tension differs:
- Measuring for clothing fit: the tape sits snug against the skin with no indentation. You want the circumference a garment must clear, so err on the side of a slightly looser reading.
- Measuring for fitness tracking: the tape sits flush but not compressive, and you record the same tension every time so week-to-week changes reflect muscle, not tape drift.
Most guides conflate the two. Keeping them separate is the single biggest improvement you can make to your numbers.
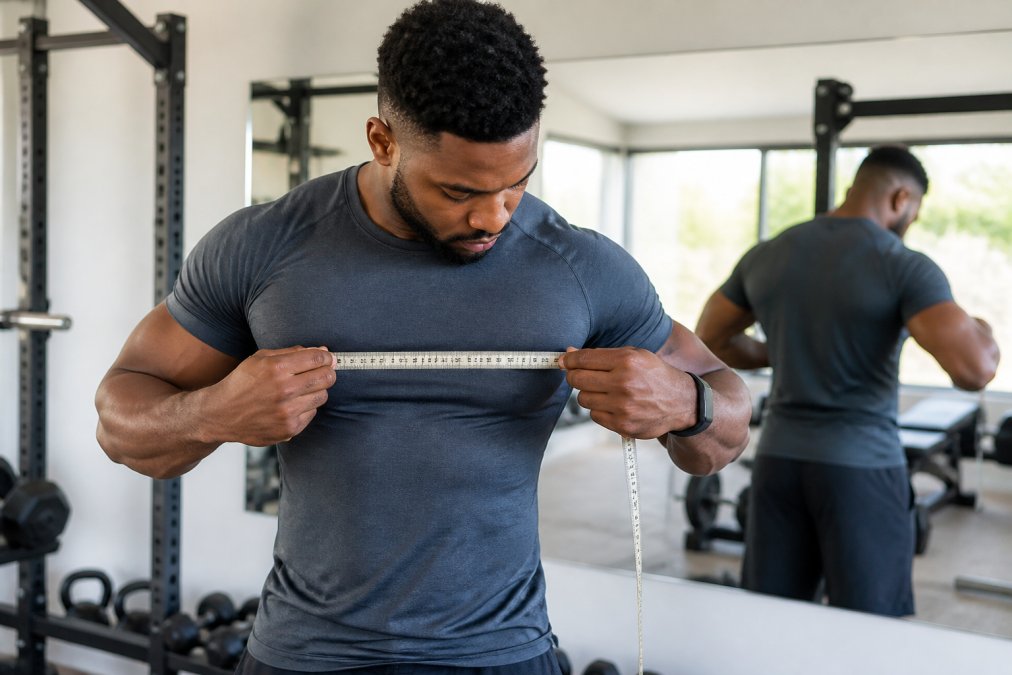
Step 1: Measure Your Chest Circumference
Wrap the tape around the fullest part of your chest, usually across the nipple line and shoulder blades. Keep the tape level all the way round, the most common error is a tape that dips at the back, which adds phantom centimetres.
To find the fullest point reliably, run the tape up and down your chest by a centimetre at a time and note where the reading peaks. That peak is your chest circumference. Record it in centimetres.
For clothing, a useful tolerance band is 2-3cm of slack in the tape. If you can slide a finger under the tape at the side, you are at the right tension for a garment measurement. If the tape leaves a red mark, you have over-tightened and your number is too small.
Step 2: Measure Arms (Biceps and Triceps)
Measure the bicep at its midpoint, between the shoulder joint and the elbow crease. Finding the midpoint is where most people go wrong: bend the arm to 90 degrees, mark the crease of the elbow and the top of the shoulder, then measure halfway between them with the arm hanging relaxed.
Take two readings on each arm:
- Relaxed: arm hanging, muscle at rest. This is the number a sleeve must clear.
- Flexed: arm bent and contracted. The difference between the two tells you how much room the sleeve needs to allow for movement.
Do both arms. A common pattern is a 1-2cm difference between dominant and non-dominant sides, and sizing to the larger arm avoids a pinched sleeve.
Step 3: Measure Thighs and Calves
For thighs, wrap the tape around the fullest part, just below the glutes. Stand with feet shoulder-width apart and weight evenly distributed, shifting weight onto one leg inflates that thigh by a noticeable margin.
For calves, measure the widest point of the lower leg, which usually sits a third of the way down from the knee. Keep both feet flat and the calf relaxed; tensing the calf for a clothing measurement gives you a number the trouser leg will not accommodate.
High Performance Shirt In Pure White →
Measuring Yourself Without a Helper
Most guides assume someone is helping. If you are on your own, these techniques keep the numbers honest:
- Chest and thighs: stand side-on to a full-length mirror so you can see whether the tape is level at the back. Use the mirror to check the tape is parallel to the floor, not just level at the front.
- Arms: measure against a door frame or wall. Press your upper arm lightly against the frame to hold the tape in place at the back, then bring the ends together at the front.
- Calves: sit on a chair with the leg straight and the heel on the floor. This removes the balance problem that makes standing self-measurement wobble.
Record every number in a simple chart, and note the tension you used so future readings match:
| Body Part | Where to Measure | Relaxed or Flexed |
|---|---|---|
| Chest | Fullest part, nipple line | Relaxed |
| Bicep | Midpoint, shoulder to elbow | Both |
| Thigh | Fullest part below glutes | Relaxed |
| Calf | Widest point | Relaxed |
How to Measure Chest for T-Shirts
For t-shirts, add roughly 5-7cm to your chest circumference to get a comfortable garment size. That extra room lets the fabric drape without pulling. But that single number is a starting point, not a rule, the right allowance depends on three things most guides ignore.
Fabric stretch. A high-stretch knit can take a smaller allowance, sometimes as little as 3-4cm, because the fabric gives as you move. A stiff cotton or a low-stretch weave needs the full 5-7cm or more, because it will not recover around your shoulders.
Shoulder and sleeve cut. Chest circumference alone does not tell you whether a shirt will fit across the shoulders. Measure your shoulder width, from the bony point of one shoulder to the other across the back, and compare it to the brand's shoulder measurement, not just the chest.
Muscle Fit vs Slim Fit: What's the Difference?
Muscle fit is cut to follow the shape of a trained physique, tapering at the waist while leaving room across the chest and arms. Slim fit simply runs narrower all over.
Tailoring Tips for Athletic Builds
Buy for your largest measurement, then have the rest tailored in. A tailor can take in a waist or shorten a sleeve, but they cannot add fabric where there is none.
A few practical rules:
- Always size to your chest and shoulders first
- Choose fabrics with natural stretch over stiff cotton
- Ask for a slight taper at the waist, not a tight one
- Leave room for movement in the upper arms
- Test the fit by raising your arms overhead
Common Mistakes When Measuring Body Parts
The biggest measuring mistake is pulling the tape too tight. That gives you a number smaller than reality, and clothing built to it will feel restrictive.
Other common errors:
- Measuring over thick clothing instead of bare skin
- Letting the tape twist or sag at the back
- Measuring only one side of the body
- Skipping the flexed measurement for arms
- Recording numbers from memory instead of writing them down
Conclusion
Finding clothing that fits a muscular build is a real challenge, and it starts with numbers you can trust. Measure your chest, arms, thighs and calves, record relaxed and flexed figures, and size to your largest measurement.
Frequently Asked Questions
What is the difference between muscle fit and slim fit?
Muscle fit is cut to accommodate larger chest, shoulders, and arms while tapering at the waist, so it contours to your physique without feeling restrictive. Slim fit is narrower throughout and doesn't allow for extra room in the thighs or biceps. If you lift weights, muscle fit prevents the baggy-waist or tight-thigh problem you get with standard slim cuts. Fitizen's hyper-stretch fabrics are designed specifically for this, giving you a tailored look that moves with you.
How should a muscle-fit t-shirt sit on the shoulders?
The shoulder seam should land right at the edge of your shoulder bone, not hanging past it or pulling inward. If the seam droops, the shirt is too big; if it digs in, it's too small. For a muscle fit, you want the fabric to skim your chest and arms without stretching tight across the back. Check that you can raise your arms overhead without the hem lifting above your waistband. Fitizen's High Performance Shirts use Gracell fibre for a soft, high-stretch fit that holds its shape.
Why do standard size guides fail for bodybuilders?
Standard size charts are based on average proportions, not muscular builds. A bodybuilder might have a chest circumference that requires a larger size, but a waist that would fit a smaller size, which puts them between sizes on most guides. Sizing up to fit the chest often means the waist is too loose, and sizing down restricts the thighs. That's why taking your own measurements and choosing muscle-fit clothing, like Fitizen's range, gives you a better fit than relying on generic S/M/L labels.
Should muscle-fit clothing feel tight or restrictive?
It should feel snug but not restrictive. You want the fabric to contour your body without limiting movement. If you can't squat, reach overhead, or sit comfortably, the fit is too tight. Muscle-fit garments use stretch fabrics that expand with you. Fitizen's hyper-stretch materials are built for activities like squatting and walking, so you get a sharp look without sacrificing range of motion. Always test by doing a few deep breaths and arm circles before deciding.